Monday, 12 November 2012
Winter Battery Syndrome
I managed to nurse my battery through last winter and yet again as soon as the weather got slightly cold the car failed to start. It's another small but annoying thing to sort out when I'm trying to sort the interior but not getting anywhere near it at the moment. Oh well, that's old cars for you and they are constantly throwing up small problems to sort out.
Saturday, 20 October 2012
Alternator
So the whistling noise is still there. My mechanics stethoscope arrived so I went into the garage feeling all Jim Dale in Carry On Doctor and managed to track down the noise to the alternator. So it appears the bearings are starting to whistle and a new (recon) alternator is going to be added to my list of things to sort out.
Everytime I feel like I'm getting close to starting to sort out the interior something mechanical looms onto the horizon. So I've got to sort the brakes which could include pads, shims, discs and calipers and now the alternator and probably before I can get to the interior. I'm also now looking at more work on the body to rectify some of the rusty areas but I think this will wait until warmer weather next year now.
Wednesday, 17 October 2012
Diff Oil and Fan Belt
Okay so continuing my search for the offending whistling item at the front of the engine, I changed the fan belt. It was fairly oily so I cleaned all the pulleys before putting the new one on and tensioned it up so there was about 3/4" of bounce if pushed at the half way point between the alternator and water pump. I will check this again after a few more miles to see if it needs re-tensioning. It seems to have made an improvement but I don't know if this has solved the problem completely as it usually is more audible after a decent drive.
I had the car up on axle stands so I could top up the diff oil as I hadn't checked this since I'd had the car either. Well, I have given up for the time being as I couldn't budge it. I haven't got a square head spanner so used a standard open spanner & mole grips with a load of WD40 and a few hours wait. Still no joy, so I'm thinking maybe applying some heat to it or getting a square head spanner or both and getting another filler plug as this one is probably going to look pretty bad if I do manage to get it off. It's not critical at the moment as the diff isn't whining or anything but I would like to sort it for peace of mind that I'm not killing my diff. Last resort I could get a garage to do it for me.
Next is to check the gearbox oil so we'll see how that goes.
Sunday, 14 October 2012
Oil Front Trunnions
I hadn't attempted to oil the trunnions since I'd had the car, so thought I'd better give it a go to be safe. After removing the grease nipples I found clean coloured oil around the nipple thread so at least it looks like something has been done in recent memory. Although I've got a grease gun, it's full of grease from doing the handbrake cable and the thought of cleaning it all out to use on the trunnions didn't sound like fun so I used a pump action oil gun with flexible hose. I pushed the hose connection in as good as I could and the seal wasn't the best but I gave it several pumps of the handle and the oil was pushed out the rubber seal. Now the question is how much of the thread will see any oil?
While driving recently I have started to hear a whistling sound. I've traced the noise by ear to the front of the engine and so I'm thinking maybe fan belt or bearing from alternator or water pump or an air leak somewhere. I've got myself a mechanics stethoscope on order which I am hoping will narrow down my search for the offending item. It is intermittent at the moment and not too loud but I guess it will only get worse so needs sorting. It has therefore jumped to the top of my to do list and depending on what is wrong and the cost of fixing it will delay getting on to the bezels and seats that I really want to replace.
While driving recently I have started to hear a whistling sound. I've traced the noise by ear to the front of the engine and so I'm thinking maybe fan belt or bearing from alternator or water pump or an air leak somewhere. I've got myself a mechanics stethoscope on order which I am hoping will narrow down my search for the offending item. It is intermittent at the moment and not too loud but I guess it will only get worse so needs sorting. It has therefore jumped to the top of my to do list and depending on what is wrong and the cost of fixing it will delay getting on to the bezels and seats that I really want to replace.
Thursday, 11 October 2012
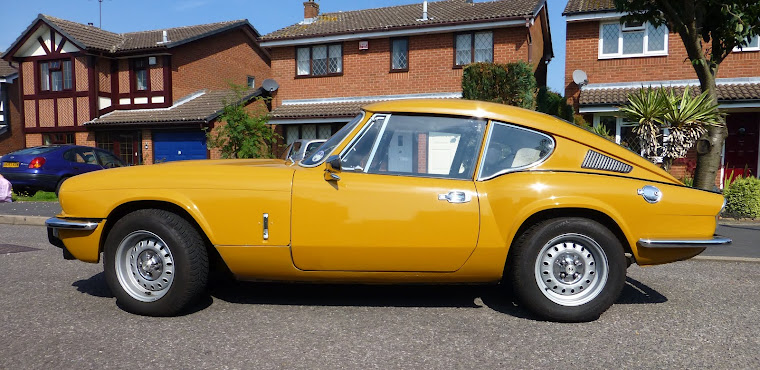
Happy 40th Birthday
My car was registered 40 years ago today and it looks better than I do.
Now the weather is starting to get colder and wetter the chances of getting the car out will become less so I am thinking about what jobs to tackle next.
The jobs that are on the agenda are:-
1. Oil trunnions
2. New brake pads and shims (possible work on brake calipers)
3. New seat foams and vinyl covers
4. Replace gauge bezels with chrome as black ones are quite rusty and black replacements seem hard to source.
5. Fill differential and gearbox with EP90
Monday, 6 August 2012
Changes
Just been looking through some of the snaps that have been taken of the car since I've had it and just thought I'd stick a couple down to show how much this car has changed visually since I picked it up.
It still amazes me how beneath all that dull oxidised paint was something so nice and the car literally changed colour after many hours of cutting and polishing. I know the first picture was taken on a dull day which makes it look even worse but it was a real transformation in the appeal of the car from almost a dull brown to a more vibrant shade . The top picture was taken on the day I picked the car up and had broken down on the journey home (I'm on the phone on the right hiding my head in shame). It was a big risk going for a Saffron coloured car but the images on the front of the Mark III sales brochure convinced me it was a great colour for this car and very of its time.
It still amazes me how beneath all that dull oxidised paint was something so nice and the car literally changed colour after many hours of cutting and polishing. I know the first picture was taken on a dull day which makes it look even worse but it was a real transformation in the appeal of the car from almost a dull brown to a more vibrant shade . The top picture was taken on the day I picked the car up and had broken down on the journey home (I'm on the phone on the right hiding my head in shame). It was a big risk going for a Saffron coloured car but the images on the front of the Mark III sales brochure convinced me it was a great colour for this car and very of its time.
 |
| So dull but I hoped something great was lurking underneath |
 |
| I don't think I was wrong |
Latest Photos
I haven't been working on the car lately just enjoying driving it when I can. I keep looking at the rear tailgate and I know I'll have to do some work on it sooner rather than later. Did a 100 mile round trip the other day when it was pretty hot and it got even hotter in the car. I noticed the gearbox also gets slightly harder to work as the car gets hotter as well.
Anyway here are a few pictures before I set out and little by little the car keeps improving.


Anyway here are a few pictures before I set out and little by little the car keeps improving.


Tuesday, 12 June 2012
Paint again
Did a bit more touch up work, this time round the back of the car on the lip above the taillight chrome trim. There had always been a patch where the paintwork had gone and rust had set in. Sanded it down and went back to bare metal removing the rust but coated with some anti rust stuff anyway. Etch primed, high build primed and then several coats of paint. Left to dry overnight and then flatted with 1500 wet and dry with soapy water, compounded and then polished.
Result was okay, not a perfect blend but good enough.

Result was okay, not a perfect blend but good enough.

Tuesday, 5 June 2012
Brake and Clutch Fluid
With changes to the brakes pads, shims and possibly calipers coming up depending on what happens when I investigate a slight bind in the left front near side wheel. I thought I would check the levels of the fluids as I will have to get some top up stuff. I had seen this triangle warning sign cable tied to the brake pipe before but hadnt really paid it too much attention until now. The lable reads use only DOT5 silicone fluid by Automec. Now I thought that DOT5 was purple in colour but the stuff in my master cyclinder is clear. So now I need to investigate whether this stuff can change colour and how to test to see whats in there. Now I know that DOT3 and DOT4 will eat your paintwork but I think thats a bit of a drastic test and I understand DOT5 repels water so I think if I add some DOT5 from the master cylinder in a jar with a little water they shouldn't mix and this will clarify that its DOT5 and has just gone a bit pale for some reason. I have heard that light can have an affect but no light can get to the fluid until you take the cap off so the jury is out on that one.
 |
| You can see the warning sign attached to the pipes |
Monday, 4 June 2012
Wheel Arches
Time had come to finally sort out "what lay beneath" and if you remember it was particularly awful.
The wheel arches were in a pretty sorry state but it was just one of those jobs I hadn't got round to until today. I gave the underside of the arches a good sand, getting rid of all the rust and such like. I then wacked on a bit of primer, followed by some stone chip and then finally some matt black which I had bought for the rear tail light panel. Also added new rubber seal trim to the back edge of the wheel arch but forgot to take a picture.
Just got to get round to the underside of the bonnet now, which is a bit dirty and the paint is all cracked but I will be looking at some other stuff before then. The tailgate and the bottom of the rear valance are currently upper most in my mind.
 |
| Pretty grim |
 |
| Stone chip added. Also check out the Hello Kitty blanket.... er... sorry about that. |
 |
| Matt black and that's not overspray in the background I'm not that bad. |
 |
| Both sides done and the blanket which I use to catch the rust and overspray. Honest. |
Just got to get round to the underside of the bonnet now, which is a bit dirty and the paint is all cracked but I will be looking at some other stuff before then. The tailgate and the bottom of the rear valance are currently upper most in my mind.
Sunday, 3 June 2012
Current Jobs List
Okay, so its an ever evolving list but these are the things that I want and in some cases need to do on the car when time and money allows
- Replace brake pads and shims and check movement of caliper pistons
- Refurbish and reinstate (if they will still fit) the engine valances
- Refurbish both seats with new foams and going back to vinyl rather than cloth
- Clean up and repaint underside of bonnet and stone chip under front wheel arches
- Remove and repaint tailgate and with new rubbers for glass
- General paint touch ups around bottom of car
- Repair dent in bonnet totally now that small SU dashpots are fitted allowing room for some big time Charlie hammer and filler work (I'm sure I will put this one off the longest)
- Get rev counter working more consistently. Will need to remove and possibly get new cable
- Get radio working as the new aerial made no difference. I prefer to listen to the car anyway but its the principle
Friday, 25 May 2012
Another 12 Months
Took the car down to Lutterworth MOT Centre for the dreaded MOT today. I found the place on the internet as it's not really that local to me but it appeared they had an understanding of classic cars. The guy who did the test, James, also had a couple of Triumphs and was very helpful and made the experience a good one. The car passed with no advisories which is great but he also pointed out one or two things that although weren't worthy of an advisory, where worth looking at over the next period. For me this is exactly what you need from an MOT station when dealing with older cars. You don't want some draconian, you've failed attitude, but one that helps you get through the test and also what to look at to get through the next one. I can't rate them highly enough and would recommend them to anyone with a classic car. Lutterworth MOT Centre in Leicestershire, you heard it here.
 |
| Can you see the Spitfire in the background? One of the projects for James |
 |
| The car had just been up in the air and the wheels hadn't settled back down again. Hence the high looking ride |
Friday, 18 May 2012
Tidy Up
Got round to some more small jobs to help tidy up the outside of the car. The rear vents which at some point were changed to black always looked good in my opinion but were now a little scuffy. I considered changing back to body colour but as the rear light panel is also black I decided to leave it.
After a sand down I used red oxide primer and then satin matt black. I do think it has really improved them and for an hours work the results speak for themselves.
MOT is also booked for the end of next week so time to start worrying.
Moved on to the rear light panel which had lost some paint around the bottom of the right lamp and had surface rust coming through above the same lamp.
After a good sand with 120 grit paper I used some etch primer and then resprayed with matt black. Another good result tidying up the car a bit more.


After a sand down I used red oxide primer and then satin matt black. I do think it has really improved them and for an hours work the results speak for themselves.
MOT is also booked for the end of next week so time to start worrying.
 |
| Red oxide primer |
 |
| Satin matt black |
 |
| Both vents now have a new lease of life |
After a good sand with 120 grit paper I used some etch primer and then resprayed with matt black. Another good result tidying up the car a bit more.


 |
| Good job much improved |
Tuesday, 15 May 2012
Rear brake lights
One thing my wife noticed as I was putting the car away was one brake light appears round and the other more rectangular. On closer inspection you can see that on one side the area around the bulb is much smaller with a very flat top and bottom and the on the other side, although still with a small flat top and bottom area, is much rounder. Looking in my Mk3 parts catalogue it shows the round version and on Canleys website it shows the 1500 Spitfire with the flatter more rectangular version so it appears I have one of each.
One thing that threw me was when looking on the Rimmer Bros website for GT6 Mk3 lights they show a picture with one of each type side by side in the same order as mine. I thought it maybe had both types originally on the car for some odd 70's reason but I cant find anywhere that can help me on that and the general forums where I posted the question so far haven't helped either.
The other news is my paint has arrived for some touch ups around the bottom of the car, the rear light panel and rear vents. I will wait until generally warmer weather before taking anything on. I also picked up a new oil filter as a package containing nothing but aerosol cans was a bit boring.
One thing that threw me was when looking on the Rimmer Bros website for GT6 Mk3 lights they show a picture with one of each type side by side in the same order as mine. I thought it maybe had both types originally on the car for some odd 70's reason but I cant find anywhere that can help me on that and the general forums where I posted the question so far haven't helped either.
 |
| You can see the one one left has a rectangular brake light and the right is more rounded |
Saturday, 12 May 2012
Small Changes
Got some new bits and pieces from James Paddock. New screws and cup washers for the dash, a new radio aerial, gear knob cap and windscreen wipers.
With my MOT coming up the wipers were a bit past it so I got some nice stainless ones which fitted no problem. One thing I did notice was one wiper arm is straight and the other over the drivers side has a left hand bend in it. Not sure if this is right to have one of each but anyway, the blades were slightly longer than my last set so I had to remove the arms and reposition.
The gear knob had reverse in the wrong direction so I finally replaced this although I do question the use of the word "new" when describing the cap I received. The screws made the dash look at little better as the old ones had no cup washer and were very rusty looking.
The aerial was a bit of pain as I had to remove some interior trim inside the rear quarter to get the cable through but after a bit of messing around and back pain I got it all rigged up. The old aerial had snapped and was held together with tape and the radio had a very poor reception. Well what a surpise all that messing about and it didn't make any difference so I will have to remove the radio now and check the connections etc. It may mean the stereo needs replacing (which I have always said it does but just can't find the spare cash to do it).
Went for a decent drive and gave the car a bit a stick and for the first time since I've had it, I actually think the car sounded good. Once you get the revs up the exhaust note changes (or in my case can be heard) and I think the car handles better and feels lighter and better balanced when you give it some.
Did a quick video of the car being revved. Sounds pretty good considering its a standard exhaust.
With my MOT coming up the wipers were a bit past it so I got some nice stainless ones which fitted no problem. One thing I did notice was one wiper arm is straight and the other over the drivers side has a left hand bend in it. Not sure if this is right to have one of each but anyway, the blades were slightly longer than my last set so I had to remove the arms and reposition.
.jpg) |
| New wipers before I repositioned. Drivers arm has a bend in it. |
The gear knob had reverse in the wrong direction so I finally replaced this although I do question the use of the word "new" when describing the cap I received. The screws made the dash look at little better as the old ones had no cup washer and were very rusty looking.
.jpg) |
| Chrome aerial looks nice but still didn't work |
The aerial was a bit of pain as I had to remove some interior trim inside the rear quarter to get the cable through but after a bit of messing around and back pain I got it all rigged up. The old aerial had snapped and was held together with tape and the radio had a very poor reception. Well what a surpise all that messing about and it didn't make any difference so I will have to remove the radio now and check the connections etc. It may mean the stereo needs replacing (which I have always said it does but just can't find the spare cash to do it).
Went for a decent drive and gave the car a bit a stick and for the first time since I've had it, I actually think the car sounded good. Once you get the revs up the exhaust note changes (or in my case can be heard) and I think the car handles better and feels lighter and better balanced when you give it some.
Did a quick video of the car being revved. Sounds pretty good considering its a standard exhaust.
Monday, 7 May 2012
MOT approaches Aaargh
I need to get the car in for an MOT during May and the panic has started to set in. I have no idea if it's going to get through or not. Basically the car seems fine with nothing really obvious but as this will be the first MOT I've done with the car I'm expecting the worst. The handbrake cable is still sticking from time to time so I need to have another look at that, but apart from that most stuff I'm going to be working on in the next period has nothing to do with the MOT at all.
The current up coming job list:-
Sticking handbrake cable
New windscreen wipers
Gear knob cap reverse in wrong direction
New radio aerial
Respray rear light panel
More touch up paint jobs around sills, rear valance, rear vents and rear light panel.
We will see how it goes and if it fails the MOT the list of jobs will surely grow.
Thursday, 26 April 2012
Steering wheel
Its only taken me 7 months but I finally managed to get the bloody steering wheel off and realign as its been on the p**s since I've had it.
I got the right size socket a few weeks back but I couldn't budge the nut and as normal all my half cans of WD40 didn't want to give up the prize held within. Well I picked a new can up this week and after a good spray and leaving it for 30 minutes it finally let go. Getting the steering wheel off was actually the easy bit. I stuck my knees up under the bottom edge of the wheel and with the nut still on the end of the shaft to prevent getting a wheel in the forehead, I gave the rear of the wheel a good bash with my hand and off it came. I had already aligned the front wheels and although its not an exact science I realigned it and put it all back together. I just need to get out in it now to make sure its correct but I know its certainly going to be better.
I got the right size socket a few weeks back but I couldn't budge the nut and as normal all my half cans of WD40 didn't want to give up the prize held within. Well I picked a new can up this week and after a good spray and leaving it for 30 minutes it finally let go. Getting the steering wheel off was actually the easy bit. I stuck my knees up under the bottom edge of the wheel and with the nut still on the end of the shaft to prevent getting a wheel in the forehead, I gave the rear of the wheel a good bash with my hand and off it came. I had already aligned the front wheels and although its not an exact science I realigned it and put it all back together. I just need to get out in it now to make sure its correct but I know its certainly going to be better.
 |
| Gave the wheel a good clean |
 |
| Very careful not to damage fine pitch spline |
 |
| Wheel back on |
 |
| All sorted now just need to test drive |
Monday, 26 March 2012
Why not a Spitfire?
Why a GT6 and not a Spitfire?
For me apart from the bonnet bulge which is nice its the roof line and rear quarter window which makes the GT6 stand out as a great looking car. You just dont get the same lines with a Spitfire even with a hard top as the roof line is totally different. I prefer the early Spits with the round tail but the square tail GT6 for me competes easily when it comes to aesthetics with the round tail GT6 Mk1 and Mk2. It all personal opinion and taste and this is mine.
 |
| Square tail Spitfire just doesn't have the same appeal to me |
v2.jpg) |
| My favourite part of the car, the roof line, rear quarter, tailgate and rear vents |
 |
| GT6 Mk1 Very 60s and very nice but still prefer Mk3 |
 |
| Spitfire MKIV plain bonnet, not for me |
.jpg) |
| Thank god the 6 cylinder didn't fit without that glorious bonnet bulge |
For me apart from the bonnet bulge which is nice its the roof line and rear quarter window which makes the GT6 stand out as a great looking car. You just dont get the same lines with a Spitfire even with a hard top as the roof line is totally different. I prefer the early Spits with the round tail but the square tail GT6 for me competes easily when it comes to aesthetics with the round tail GT6 Mk1 and Mk2. It all personal opinion and taste and this is mine.
Tuesday, 20 March 2012
Rocker Cover Gasket
Got round to changing the rocker cover gasket as it has been leaking oil since day one.
Purchased parts from Rimmer Bros again but when it came to fitting I realised that I have 3 studs going through the rocker cover and I think it should be 2 studs and 1 bolt. Anyway sorted it out no problem and checked rocker clearances at the same time. All seems okay.


Purchased parts from Rimmer Bros again but when it came to fitting I realised that I have 3 studs going through the rocker cover and I think it should be 2 studs and 1 bolt. Anyway sorted it out no problem and checked rocker clearances at the same time. All seems okay.
 |
| Rocker cover off |


 |
| Getting the old cork gasket off was a bit of a bitch |
 |
| Non of your shiny chrome finish rubbish. This is a Triumph not a vanity mirror. |
Tuesday, 13 March 2012
Rear Brakes
Decided to have a look at the rear brakes and also check to see if there was any obvious problem with the wheel bearings, rotoflex coupling and UJ's.

Using the trusty jack that came with the car I remove the wheels and then the brake drums. I tweaked the manual adjuster to ensure no additional drag and to be honest the wheel bearings appear to be fine with no noise or additional play. The rotoflex couplings although a bit weathered are also okay and completely intact. There is a very slight amount of backlash when rotating the hub before the diff UJ moves, approx 2mm of movement I would say. Don't know if this is normal or if this indicates UJ wear so I will have to look into this. The brake shoes themselves also look good with plenty of life left in them. Also realised that I don't have Koni shocks all the way round as the rears are actually Spax with Koni just on the front. Also managed to get some grease into the handbrake cable guides.


Using the trusty jack that came with the car I remove the wheels and then the brake drums. I tweaked the manual adjuster to ensure no additional drag and to be honest the wheel bearings appear to be fine with no noise or additional play. The rotoflex couplings although a bit weathered are also okay and completely intact. There is a very slight amount of backlash when rotating the hub before the diff UJ moves, approx 2mm of movement I would say. Don't know if this is normal or if this indicates UJ wear so I will have to look into this. The brake shoes themselves also look good with plenty of life left in them. Also realised that I don't have Koni shocks all the way round as the rears are actually Spax with Koni just on the front. Also managed to get some grease into the handbrake cable guides.


Sunday, 11 March 2012
Tuning Carbs
Finally got round to trying to sort the carbs out as they have always been a little bit lean. Took the car for a drive to get her up to temperature and then I removed the airfilters.

Started the process by loosening the throttle nuts so both carbs worked independently and then I gave my new Gunson Carbalancer a go. Unfortunatley the Gunson gizmo didnt fit between the cap head screws on the filter back plates so had to remove them as well.

Anyway, rotating the bezel on the Gunson I got a reading from carb 1 and then moved across to carb 2 which was slightly different so I tweaked the idle screw to match the airflow on both carbs. I then moved on to the mixture and using the lift pins on both carbs the revs died very quickly confirming they were both running lean.

Starting on carb 1 I rotated the bottom nut anticlockwise (when viewed from underneath) to adjust the jet and enrich the mixture. Each time I moved 2 flats (6 flats to 360 degrees) I used the lift pin to check what was happening and after 8 flats the revs just increased before settling back again, perfect. I then repeated the process on carb 2 and this time reached the same outcome after 4 flats anticlockwise.
The throttle nuts were then tightened up ensuring both carb pistons rise together when using the throttle (that bit wasn't as easy I thought) and then retested both airflow and the lift pins again and all was the same. The idle RPM had changed slightly and so I adjusted the idle set screws to 700 RPM and then went out for a spin.
Definitely a good result and the car was smoother and seemed to have a little more power. Now comes the downer.... I'm not 100% sure but I think something is rumbling from the rear. I get lots of cabin noise from rear boards anyway and the tools are also stuck down by the spare wheel and the roads are pretty bumpy and the Koni shocks are very firm ride but mmm... I hope I'm wrong and its just road noise or the harsh ride, we'll see.
Sunday, 4 March 2012
History Part 2
If you remember last year I had decided to change the steering wheel, dash facia, gauge bezels and a few other cosmetic bits and pieces. Well, as I've got to know the car I've had a change of heart and I'm going to leave it as it is, in as far as I know, original condition. If I wanted it to look new I should have got a new car rather than one thats 40 years old this year. The seat covers I hope I will still change back to the vinyl at some point though, as cloth covers are not what should be there.
Thursday, 1 March 2012
.jpg)
.jpg)
.jpg)
.jpg)
.jpg)

Subscribe to:
Posts (Atom)